Most teachers follow the typical first-day-of-school protocol which includes passing out books and discussing class policies. BORING! If you want kids to be passionate about chemistry, get kids up off their butts and investigating cool things from day one! A teacher on Twitter recently asked me to share my First Day Lab. This post provides details about that lab and a reflection of how the lab changed this year to reflect NGSS. For twenty-some years I’ve been using slight variations of the same lab. It includes a teacher demonstration and three activities performed by students at lab tables. This year, with a lofty goal of NGSS-ifying my curriculum, I adapted my First Day Lab to focus on science and engineering practices. This post breaks down the lab and provides reflections on all four parts. A link to my First Day Lab can be found at the end of this post.
Demonstration
The teacher demonstration began by placing water and Milk of Magnesia in an Erlenmeyer flask. Universal indicator was added while a magnetic stirrer provided constant mixing. I stopped at this point in the lab and asked my lab teams to discuss what had happened so far. The question seemed simple right? The liquid looked purple. What’s the big deal? After reading an article entitled Critical Response Protocol in the April/May 2016 issue of The Science Teacher [1], I wanted to improve my classroom discourse and draw out student thinking. At this moment in the demonstration I tried to flush out all of the students’ background knowledge, which could be shared and built upon by the rest of the class. I asked lab teams to share their observations but more importantly I wanted them to discuss what they knew about the chemicals involved. What is universal indicator? What is Milk of Magnesia and why do people use it? I heard things like… acids, bases, diarrhea, constipation, my Grandma takes it, pH value. Teams shared ideas “popcorn style” in a whole-class dialog, which gave me an opportunity to ask questions and gauge understanding of concepts. The demonstration continued. I added a few squirts of vinegar to the purple suspension. Flashes of red appeared, then quickly transformed into yellow, green, blue, and the original purple color. I heard lots of oooohs and that’s so cool. I performed the demonstration more than once to show that the original purple color would return.

Flashes of red from the vinegar gradually
change back to the original purple color.
In addition to emphasizing a whole-group discussion and flushing out of background knowledge, I made another significant change to the demonstration. In the past I would ask my students: “Write down your observations. Be detailed and don’t leave out anything!!” This year I adapted the lab to emphasize SEPS. Students were challenged to write down one question they had about the demonstration. Upon sharing their questions with their lab team, they had to focus on one question and brainstorm “What evidence would you need to collect to answer your question?” In other words, what would you do next to investigate this question? Whoa… that’s tough stuff. Making an observation is easy; Having the foresight to figure out the steps needed to answer your own questions is tough. The next step was also new for me. Teams shared their questions with the class and I challenged them to explain the steps they would take to investigate their questions. Something cool happened. I let them boss me around! If they said: I want to know why the colors changed… then I said: Tell me what I should physically do to help you answer that question. They responded: Do the experiment over without the universal indicator. So we did!! This led to a great conversation about the purpose of universal indicator and definitions of acids and bases.
Another student asked this question: I just don’t understand why the liquid doesn’t turn green. Why does it keep going back to purple? When I invited him to boss me around, he told me to add more vinegar. So we did. I added several rounds of vinegar and by the fourth round, to the group’s surprise, the liquid finally stayed red and became CLEAR rather than cloudy. Suddenly students were talking to each other and more questions erupted about how we “broke” the demonstration. I realized the beauty of this practice. Rather than following a cookbook set of instructions, students were guiding the investigation and making scientific decisions based on their own decisions.
Here’s some other things my students wanted me to try:
- We removed the magnetic stirrer and tried the demonstration again.
- We tried the demonstration without adding universal indicator.
- We tested the vinegar and Milk of Magnesia in separate beakers with universal indicator.
- We switched out vinegar for hydrochloric acid and repeated the demonstration.
Initially getting the kids to communicate with each other was a little tough. But once the questions started, they were curious about what tests could be run to answer their questions.
**By the way, this demonstration is typically done in AP Chemistry to discuss the Ksp of magnesium hydroxide, which is only slightly soluble in water (hence the cloudy white color). For higher level discussions, Le Chatelier’s Principle can be brought in to discuss the “shift right” as the acid removes the hydroxide ions from the system.
Part 2

Students observe “red stuff” forming
In Part 2, students observed a chemical reaction between a copper II chloride solution and aluminum foil. In past years students have insisted that the “red stuff” that appeared was rust. This misconception always bothered me so I figured why not address it in the post-lab questions. The post-lab asked students what evidence they would have to collect to prove or disprove that the “red stuff” was rust. Our post-lab discussion startled me. Very few, if any, students understood ways that they could physically or chemically determine the identity of a substance. Accelerated and regular level chemistry students all struggled to think of ways to test the “red stuff”. I realized how little they knew about physical and chemical properties of substances. After extensive prompting, students realized that they would need to obtain a piece of rust and compare its properties to the “red stuff”. However, they struggled to come up with more tests than just similar color, texture, and how it looks under a microscope.
Part 3
In Part 3, hydrochloric acid (spiked red with universal indicator) was placed in a beaker. Students tipped the beaker at 45 degree angle while three squirts of saturated sodium carbonate solution were dribbled down the side of the beaker.

A rainbow forms as
sodium carbonate
slides to the bottom
of the beaker.
Whoa…. A rainbow!! Now for something weird. Some powdered sodium polyacrylate (which I call GUK so they can’t Google it) was tossed into the rainbow solution. The GUK absorbed the liquid to make what looked like a gelatinous slushy. One of the post-lab questions in Part 3 purposely addressed an aspect of the high school Engineering Design Performance Expectations. The engineering performance expectations ask students to “analyze major global challenges” and “design solutions to complex real-world problems.” Students were challenged to think of a global problem that could possibly be helped by using the chemical GUK in some way.

Students observe GUK’s
ability to soak up liquid.
Based on the recent flooding in Louisiana, one student suggested sprinkling GUK in sandbags to soak up water to decrease destruction to houses.
Another student wondered if GUK could soak up water on shorelines to prevent coastal destruction due to increasing ocean water levels. This led to a discussion of GUK’s properties and capabilities and the magnitude of the problem involving rising sea levels.
Part 4
In Part 4, a Fuji film canister is filled halfway with vinegar. The bellybutton of the cap is filled with baking soda. Quickly the cap is clicked on top of the canister and the canister exploded, often hitting the ceiling. The result was screaming, laughing teenagers who were having the time of their life on the first day of school. The post-lab question in Part 4 challenged students to make a claim as to the identity of the gas that caused the canister to explode. Empirical data from testing the gas was provided. Students then wrote their first scientific argument (SEP-7). Although this question scared a few students, most of them realized the need to research (Google) the experimental data that was provided in the question and when I asked them about their claim, the entire class responded, “It’s carbon dioxide!!”
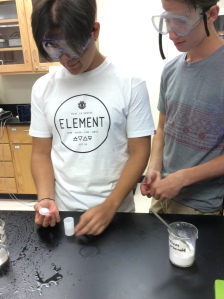
Students prep
Fuji film canister.
Final Reflections on the Lab
The changes I made to my first day lab left me with some powerful realizations.
- My old lab was too simple and expected too little of my students. By incorporating SEPS into the revised lab, my students thought more like real scientists.
- I loved the whole-class discussion during the demonstration part of the lab. I appreciated the importance of “flushing out” background knowledge and sharing that information as a class. It allowed everyone to build upon what we discussed as a group.
- Challenging students to find answers to their scientific questions changed the way I teach chemistry. Now that I’ve encouraged them to brainstorm what evidence would be needed to answer their questions, I realize how much harder they’re thinking about the steps needed to solve a problem.
- One of my students walked out the door and said to me, “I had so much fun today!” We started off the school year with a passion for learning science. Success.
Copy of My First Day Lab (which is called “Chem Is Try Lab”)
I updated this lab in 2021. The major difference involves the CER in question #10. On Day 2, students learned how to write a scientific argument and worked on question #10 for homework. The 2021 version is provided below if you’d like to see the update.
References
- Ellingston, C.,Roehrig, G., Bakkum, K., and Dubinsky, J. (2016). Critical Response Protocol, The Science Teacher.
**Featured image photographed by Benita Zepeda.

Wow, love this! I also teach Chem but not in a NGSS state. Our standards are 3 dimensional though so I’m attempting to transition my teaching to match. This is awesome, thanks so much for sharing!
LikeLike
Thanks for sharing Tanya! Your work inspires me. See you soon.
LikeLike
THANK YOU for sharing this! We are transitioning to NGSS and this is an amazing resource I plan to use. I appreciate you sharing your hard work (& thought processes) so freely!!
LikeLike
Hi Tayna,
I’m a little behind the NGSS trend. Your post’s are inspiring and insightful! Thank you for sharing.
LikeLike
This is great! How long ilare your class periods the firsy day? I don’t think I could fit all of this in.
LikeLike
I teach on a block schedule. I see my students every other day for 94 minutes.
LikeLike
THank you, this looks great! How do you address safety and using materials during this experiment on your first day?
LikeLike
Margie- I briefly discuss lab safety as we discuss the stations. For instance, I emphasize that Illinois state law requires all lab students to wear safety googles when in the laboratory. Also, the molarity of the HCl is extremely low, only 0.1 Molar, to keep kids safe.
LikeLike
Thanks! It was a hit! I did this with my honors classes first and was a little hesitant about using it with a regular class, but it was great. I appreciate you sharing.
LikeLike
Thank you so much for sharing this. I teach biology in a public suburban school south of Pittsburgh, and next year will be my first year of chemistry. I am grateful for this post and plan to incorporate this my first week of school. We have shortened 38 minute periods every day for the first week, so I’ll break this up each day as we learn the laboratory safety content and the lab equipment.
LikeLike
Thank you for sharing this! Each new year I look for better ways to engage kids on the first day and not do a dumb or thoughtless activity. I plan to use part of your activity to set the tone for reg chem this year.
LikeLike
You said that you have 94 minute blocks (mine are 88 minutes). I’m assuming this just takes you that first class – just the one block? I’m super excited to try this and really appreciate you sharing your creativity and how you aligned it with NGSS!!
LikeLike
Yes! We complete the entire lab on the first day and they work on post-lab questions #1-9 for homework. On Day 2, we discuss scientific arguments and they complete the CER in #10 for homework.
LikeLike